About Me

My photo
Just your average high school girl hoping to inspire and innovate.

Monday, November 21, 2011

Cheap alternative to deco cases for phones!

Everyone has seen them. Deco'd phone cases.("Deco" short for decorated)
Examples(pictures from google images):


Who wouldn't want one of these cases on their own phones? They are too cute, but this cuteness comes at a price. For those that don't know, cases like these run around 60$-100$+. For students like me money for something like that doesn't come easy.
So here's my cheap alternative: stickers. Yes, stickers. It may sound tacky and even silly but If you do it right it should look pretty decent! Don't believe me? Here's my phone:

I'm pretty satisfied with the results. Another reason why I chose to "diy" instead of buying a case for it was because they didn't have a case for my kind of phone. Deco phone cases were usually limited to styles only for iphones...-___-

Hehe I burned a phone charm hole on my phone because mine didn't come with one ^___^;;

When you deco your own phone you can customize it, in mine I put my boyfriends name and I put a picture of me and my cousins(: <3


How to Deco your phone:
1.
Start off with a clean phone.

2. Get stickers(preferably 3D ones, but that is optional) and a phone charm.(just to add a little more decoration but again, optional)

3. Start decorating your phone and get creative! Mine only took about half an hour to finish and it was fun (:

I deco'd my phone about 3 months ago and the stickers are still in place. Also, the stickers that i bought were 6$ per set. (super cheap! C:)

Sunday, November 20, 2011

Matte attack!

So recently my mom bought me two new nail polishes(how sweet of her) and i change my nail color/design every week so i decided to try one of them out. The color that I used was a similar color that I've used before so I kind of didn't like it at first but then I noticed something weird.
As it started to dry the shine would disappear and finally I realized it was a matte nail polish!!! So I was so excited!!! I fell in love with it immediately because it was so pretty matte and also it was my first matte nail polish<33
When it's dry:

It's not that light in person it's actually more of a teal color.
Enjoy!!!! (:

Sunday, November 6, 2011

Beauty Coil Review!

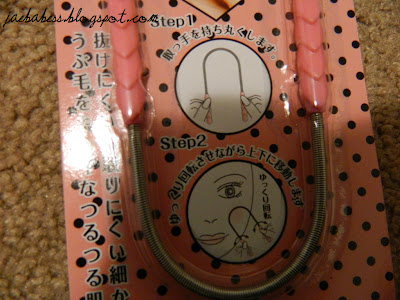
Just a quick review on this hair remover that I picked up from Daiso. It was only 1.50$ so I thought why not! I've seen this thing everywhere on the internet, from blogs to online shops and I always wondered to myself "Does this thing really work?" To answer that question, yes and no.
Basically you're supposed to bend(because it comes straight) and twist it and hair should come out.
Results:
I was quite skeptical before I used this, but hair did in fact come out! It does hurt, and it feels like someone is pinching you. Also, I noticed that it usually works more effectively if used on short hairs because, I tried it with mine and my bf's eyebrows and it barely snagged any of the long hairs. It did get the shorter one's tho! >:)
I'd give it a 5/10 since it did get some hairs out, but not all. In my opinion I would much rather stick with tweezers. :P

Saturday, November 5, 2011

At home nail fix.

So lately the weather around here has been so crazy. One day it would be scorching hot and then the next cold as ice. This constant weather change has taken a toll on my hair and especially my poor nails!! What do I do with these chipped brittle nails?!
Step 1: Chop these bad boys off. I know it may be hard to (especially if they have grown out really long) but it would be WAYYYY better if you just start off fresh. Buffing out chipped nails may save you the pain of cutting them, BUT it can also weaken your nail and make them more prone to breakage. (So I wouldn't suggest it)
Step 2: Make sure your nail is clean of any old nail polish and then moisturize them with a hand lotion. I like to use the one from Bath and Body Works. <3
Step 3: Finally, paint away~! (:
And done! Quick and easy way to just fix up your nails at home. Enjoy~! (:

Saturday, October 29, 2011

Get Creative!

I am absolutely in love love LOVE! with this website that my cousin Deanna (http://deannaflows.blogspot.com/) introduced me to while we chatted on the phone the other night. The website is called http://craftgawker.com. Basically it is this DIY website and it also promotes your blog when you submit! Personally I love saving money and I definitely love crafting so when I saw all the DIY's I was just hooked!
I came across a blog that was absolutely inspiring. The url is http://www.crochetclouds.com. I swear this girl could make anything out of everything! It's amazing how she can make affordable imitations of expensive brands like in one of her DIY's she made a 445$ YSL bag for only 6$!!!
Anyways, check it out and that Is all I have to share for today! Happy crafting (: <3

Daiso Haul!

Yesterday, me and my mom dropped off my brother at a doctors appointment in SF which left us with 2 hours to kill while waiting for him. So my mom asked what cheap place we could browse that is near by and Japan town happened to be a 5 minute drive away! <3 I showed her Daiso [this 1.50+ store that sells Japanese goods] and it was nice to see that she was having a good time looking at all the cheap unique things.
Things that I bought:
  1. 2 empty spray bottles. 1.50$ each
  2. Blue button-down shirt for men. (will most likely do a tutorial on how to dress it up.) 8$
  3. Food container :D 1.50$
  4. Cute animal shaped body sponge(?) (most favorite item that I bought since it's so cute!! xD) 1.50$
  5. Rubber exfoliator. 1.50$
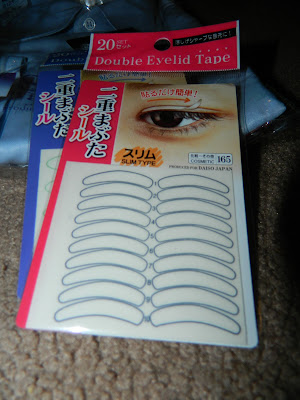
  6. Eyelid tape. 1-1.50$ each

Tuesday, October 18, 2011

33 Months Gift.

So for mine and my boyfriend's 33 months(which was last month) I bought him :
  • A Motorola bluetooth
  • Sony headphones
This month I kind of splurged on gifts for him, because I felt that he deserved it for being such a great boyfriend towards me.
Along with those material things I also made him spamasubi and chocolate covered strawberries.

Also here is a tutorial on how to make these. They're easy, affordable, thoughtful, and yummy! (:

While making these I had trouble using the white chocolate for dipping, I don't know why. Good luck to anyone that tries this though! :D

Saturday, October 8, 2011

Makeup for beginners.

Hello there loves. Today I chose to make my first post on this blog about something that I personally love, makeup. I first started to wear makeup during 7th grade in middle school. At the time it was very minimal and just consisted of eyeliner and mascara, but honestly I feel that I started a little early. I really started to get into makeup(like wearing it almost daily and adding more to my makeup routine) around late freshmen-early sophomore year.
Basically all I'm going to do for this post is just list off all the things that I think are essential to starting off with makeup.
  1. Concealer.
    This is a girl's bestfriend on days after all-nighters, panda eyes, after effects of crying, pimples, you name it. The concealer that I am currently using is a drugstore brand which is:
    Maybelline NY's Mineral Power Natural Perfecting Concealer in fair. (4-6$)

  2. I usually apply this under my eyes and I put foundation over it. I believe this concealer only comes in 3 shades sadly.

  3. Foundation.
    This stuff works great in evening out the skin tone on your face. The one that I am currently using is also a drugstore brand which is:
    Maybelline NY's Dream Smooth Mousse in #240 Natural Beige, this foundation comes in many different forms like liquid.(7-8$)
    I don't use foundation all over my face only under my eyes over my concealer.

  4. Eyeliner.
    Eyeliner can really add a little kick to your eyes especially if you use different colors, but since this is makeup for beginners I suggest that you stick to black or brown eyeliner for a more natural look. The one that I have been using for a while now is actually a gel liner and is also a drugstore brand which is :
    HIP's color truth cream eyeliner in 905 black. The pencil liner next to it is by Milani but I don't use it too often.(7-8$)
    I prefer to use a gel liner over a pencil one because I feel that it lasts longer throughout my day without smudging. The thing with gel liners is that you have to use a brush to apply it so if you don't feel comfortable you can use a pencil or liquid liner. Tip: Always set your eyeliner with a black eye shadow so that the liner lasts longer and is less smudge-prone.

  5. Mascara.
    This can add a dramatic look to your eyes depending on how many coats you use. The one that I have is:
    Lash Blast fusion by Cover Girl(5$)
    For me, I don't really use mascara since it doesn't really work for my lashes and it's a pain for me to remove. I usually use false eyelashes but again, since this is for beginners I will list this anyways.

  6. Eyelash curler.
    This can really open up the eyes and make them more dramatic. The one that I have been using didn't really have a name but I just got it from a beauty supply at my local mall.(2-3$)

    Tip: Use this before you apply your mascara, NEVER use this before you apply your mascara, because it can pull off some of your eyelashes.

  7. Lip gloss.
    This can add subtle color to your lips while hydrating your lips at the same time.
    The ones that I usually like to grab for are:
    Lemon & Pomegranate Lip Cream from Bath and Body Works(7.50$), Beauty Rush in Tootie Fruity by Victoria's Secret(7$), and lastly lip gloss from Charlotte Russe(Originally 3+$ but I got it for 1$ because it was on sale)

    I usually use Vaseline on my lips for daily use but on days when I just need a little pop to my lips I use these along with a lipstick, but I don't suggest using lipstick if you're just starting out.
So that is it for the basics, I hope this helped somehow. Good luck! :)